 Cupcake pincushions are adorable additions to any craft room and make great gifts for any seamstress or crafters.
I enjoy making crafts. The more unique and unusual, the more I like them. If they happen to be easy enough to make in a few hours, then I know I will have a lot of fun. That is the case with the Cupcake Pincushions.
I invited my mother over to play. Together we made several. I don’t like to waste anything, so we made cookies with the leftovers.
Let me warn you at the beginning, I never do anything strictly by the instructions. I have made a few changes to the original directions in the book. For instance, the book said to leave the wooden skewer in while you decorate. I found it easier to decorate with the skewers completely removed.
Feel free to use this as a guide and make the changes that appeal to you. There are so many options in decorating!
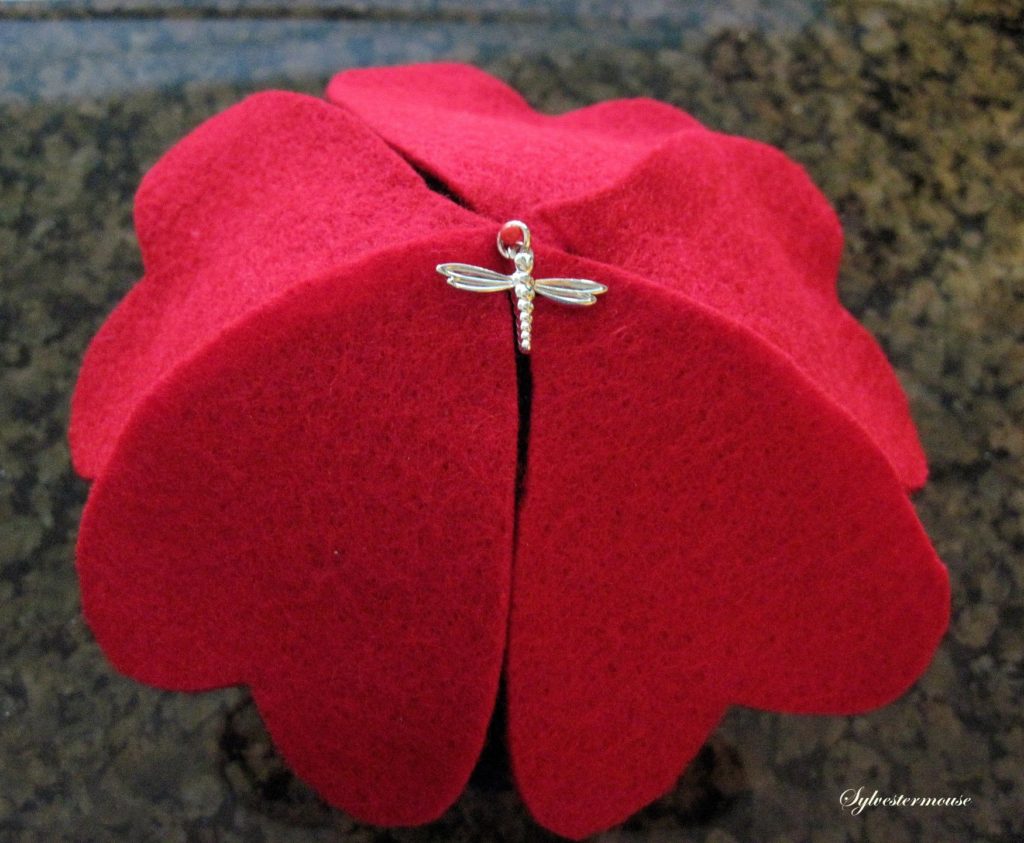
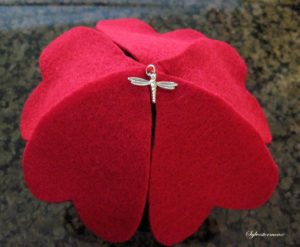
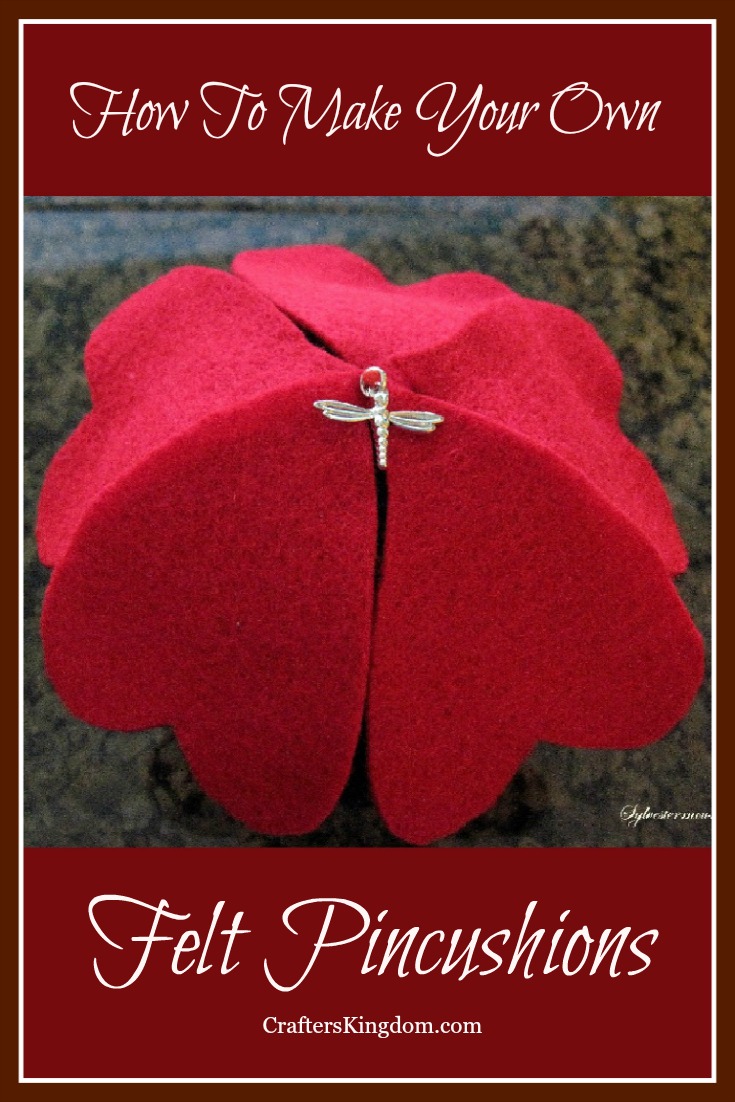
This is my personal favorite of the cupcake pincushions we made. I really love the inverted hearts and that little dragonfly charm.
Oh, and it was so very easy to make!
Supplies Needed to Make Felt Cupcakes
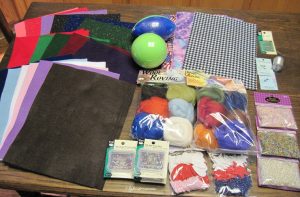 Foam Ball (The book recommended Nerf brand, but I purchased Poof brand. Nerf was not available)
- Small Foam Football
- Felt
- Decorations: Beads, charms, rick-rack, straight pins with pearl heads, metallic thread, etc.
- Wooden Skewer
- Craft Glue ~ I use Aleene’s Craft Glue
Cupcakes!: 30+ Yummy Projects
to Sew, Quilt, Knit & BakeCheck Price
The Book that Inspired the Cupcakes!
While I did not adhere strictly to the instructions in the book, I did use their instructions as a guide for making my cupcakes.
I especially like the templates in this book. The holly and the hearts used on our cupcakes were drawn with the templates in this book.
Instructions for Shaping the Felt Cupcake Pincushion
 Step 1: Cut the Nerf Ball in half. Each halve will be the top of a cupcake.
Step 2: For the base of the cupcake, you will cut the Nerf Football into sections. Using a sharp, straight edge kitchen knife, start by cutting the the tips off of the football so the base will sit flat. Then cut a section measuring 1 1/2″ off each end. There will be a 1″ section in the center of the football that will not be used on the cupcakes. This is the piece we used for cookie pincushions. *
Step 3: Stick the wooden skewer through the center one top piece and one base piece.
Step 4: Glue the pieces together and hold until dry. About 5 minutes. I did not apply glue to the edges of the sections, I wanted to be able to stuff the edges of the felt between the sections,
*These measurements are approximate.
Step by Step Photos of Shaping the Felt Cupcake Pincushion – Steps 1-4
Click thumbnail to view full-size
Covering the Felt Cupcake Pincushion
Step 5: Cut a felt strip wide enough to cover the base of the cupcake. Approx. 12″ x 3″
Step 6: Glue the felt strip to the base of the cupcake, using straight pins to hold the felt in place until it drys.
Step 7: Cut approx. 7 1/2″ notches in the bottom of the felt strip, fold down and glue to the bottom of the base.
Step 8: Cut a round piece of felt, approx. 7″. Cover the top of the cupcake. Glue down and tuck in the edges.
Step 9: Remove straight pins on bottom.
Step 10: Cut a round piece of felt, approx. 2″, and glue on. This will cover the folded edges.
Step by Step photos for Covering the Felt Cupcake – Steps 5-10
Click thumbnail to view full-size
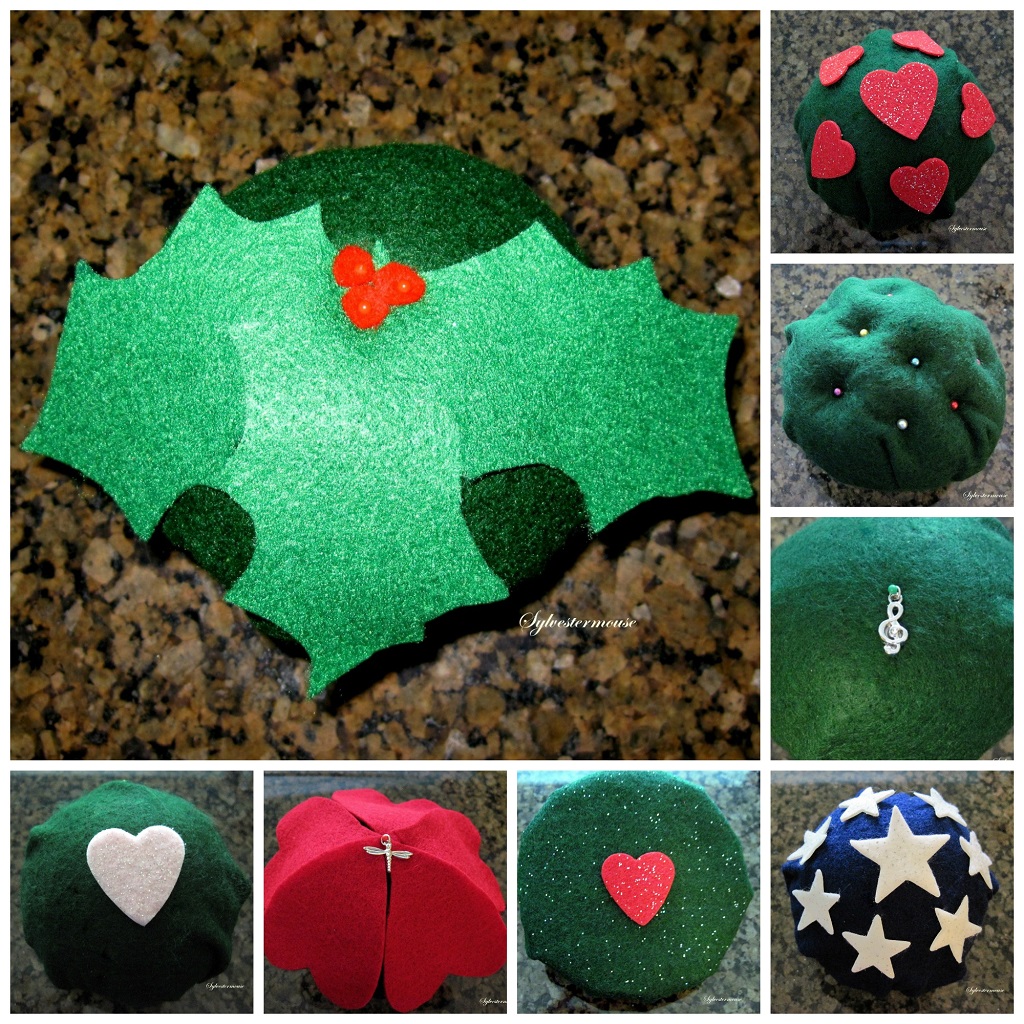
Decorating the Cupcake Pincushions
This is the point where individuality is the focus. We decorated our cupcakes several different ways. Some with felt hearts or stars, some with charms, some just with pearl headed pins. We glued our decorations on with light dabs of glue. Of course, they could be tacked on with a needle and thread if you prefer.
In the gallery below, I have shared pictures of some of our cupcakes. Because we plan to really use our pincushions, we did not want a lot of decorations on them. However, I can imagine some really pretty pincushions that would be made more for display, than practical use.
Have Fun!!!
If You Hate Shopping Like I Do, It is Wonderful & Easy to Buy Online
Life Glow 1.5mm Thick DIY Polyester Nonwoven Fabric Soft Square Sheet, 10×10-cm/ 4×4-Inch, 50-PiecesCheck PriceALEENES 15599 All Purpose Glue, 8-OunceCheck PriceBamboo Skewers Pack (100Pcs/Bag) – 12Check Price
&
Our Felt Cupcake Pincushions Photo Gallery
This craft article was originally published by me in 2010 on a different site that no longer exists.
All Photos are mine and should not be used without written permission.
© Sylvestermouse – 2010
Originally posted 2017-02-08 18:25:14.


How adorable these felt cupcake pincushions turned out! Bet it was an especially fun project to do with your mom. My daughter-in-law and I like to craft together, so I know how much fun it is to work together.
What a fun, cute project! I love that there’s so much room for individual interpretation. The dragonfly charm really caught my eye. Glad you have your mother close by to be your crafting partner.
Enjoyed reading this, very good stuff, regards.