
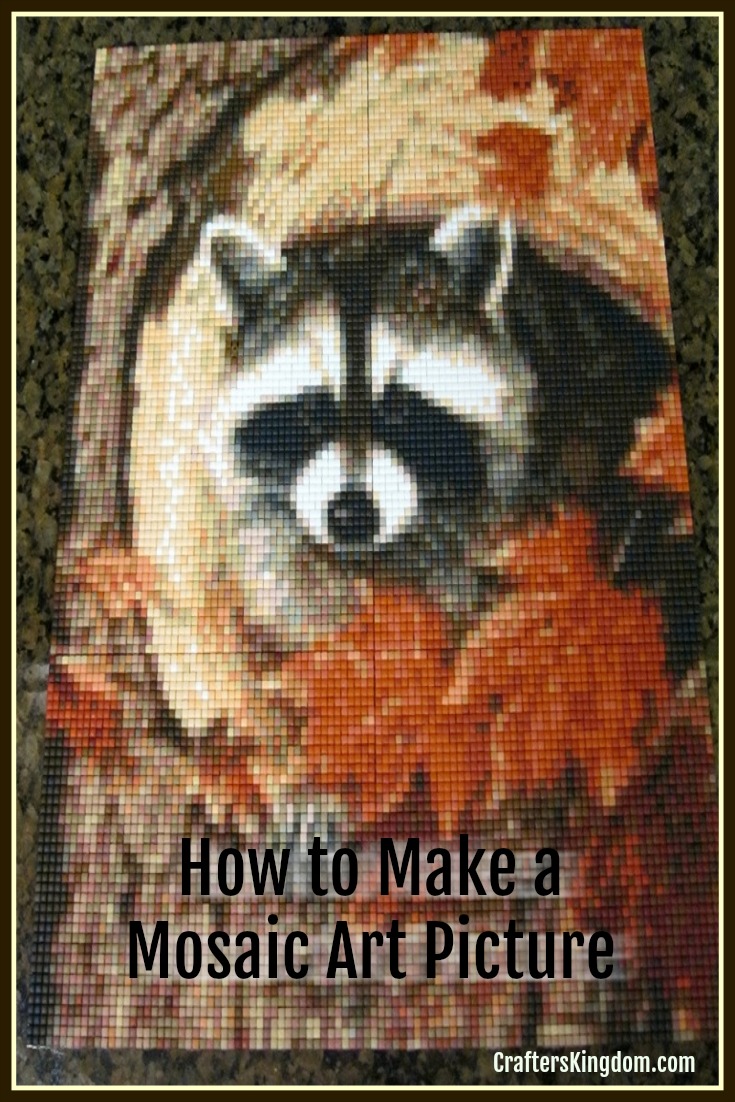
How to Make a Mosaic Picture With HobbyWare PixelHobby Art Kits
How to Make Beautiful Mosaic Pictures
 I have always loved Mosaics and Mosaic art and I have always wanted to make my own mosaics. When I discovered the Mosaic Art kits by HobbyWare, I was ecstatic and I immediately went to work. These kits make creating a beautiful mosaic easy.
Over the years, I have shared several craft tutorials online. I am pleased to write and share this tutorial on how to make a mosaic picture with a HobbyWare Pixel Hobby art kit.
Hobbyware has been a trusted name in crafting for many years. I first became acquainted with them when I started using their Hobbyware Pattern Maker Cross Stitch Software. I loved being able to convert my own pictures to a cross stitch pattern. When they introduced their Pixel Hobby Mosaic Art Kits, I did not hesitate to buy my first kit.
I recently made this mosaic picture to give my dad for his birthday. I absolutely love the mosaic I made for my father. So much so, I think I need to make one for myself now.
Creating your own mosaic picture has never been easier!
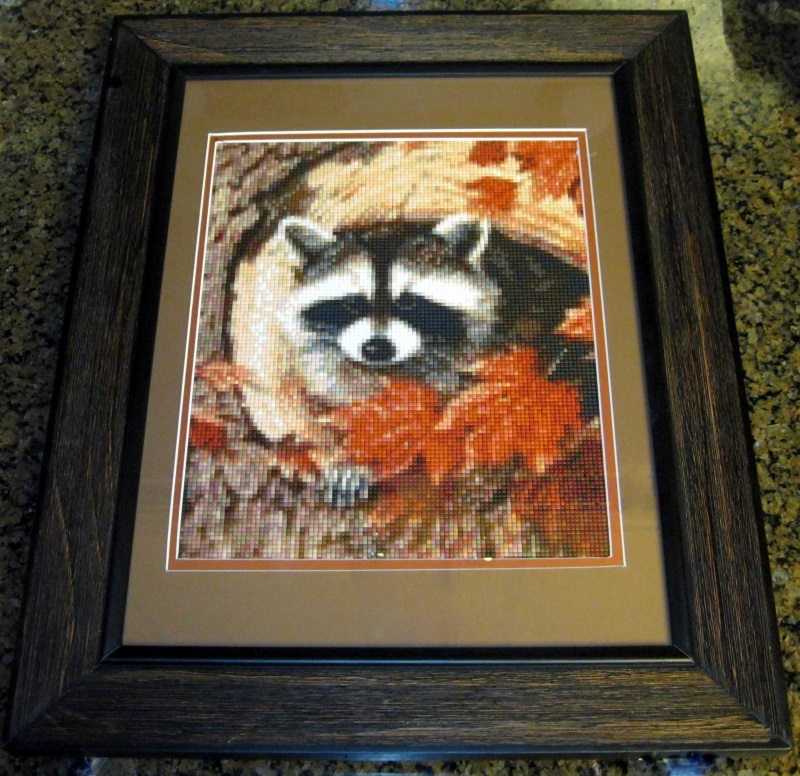
My Father’s Birthday Gift – The Raccoon Babe Mosaic Picture
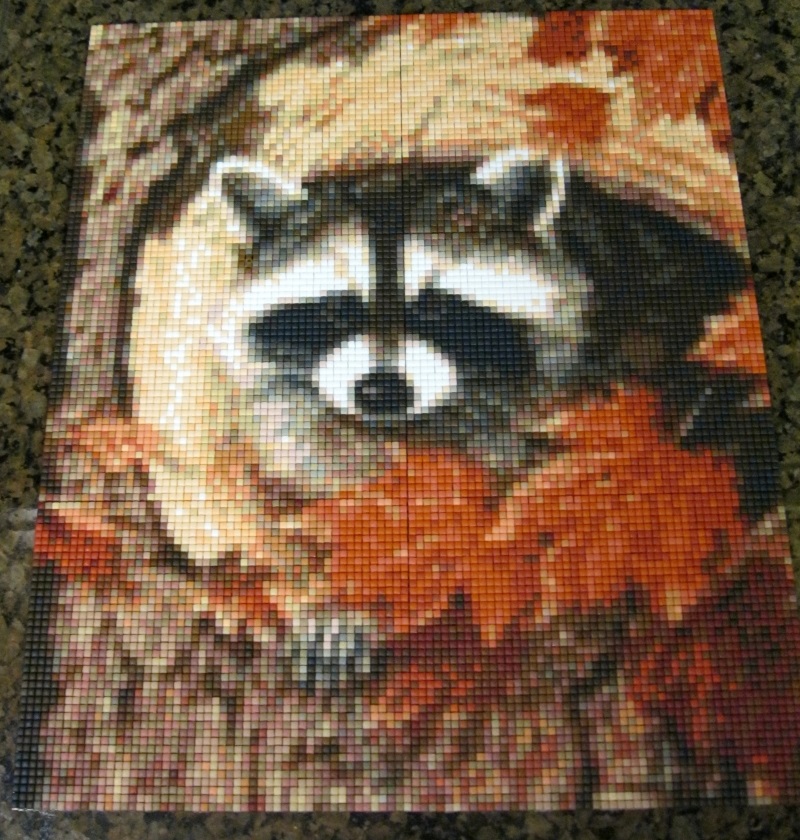
My father feeds and cares for a variety of wild animals and has for many years. Among his favorites are his raccoons. As soon as I saw the Raccoon Babe Mosaic Picture Kit, I knew what I would be giving him for his next birthday.
Below you will see a photo of the Raccoon Babe Mosaic framed with mats.
HobbyWare Pixel Hobby Terms
LEPOWER Metal Desk Lamp, Adjustable Goose NeckCheck PriceThere are only a few terms or names you will need to be familiar with before you begin.
- Baseplate ~ The clear acrylic peg board
- Pixel ~ The square colored pieces used to create the picture
- Design Sheet ~ Pattern or Chart
Having a great lamp is also essential.
You need enough light to see the pattern through the base-plate.
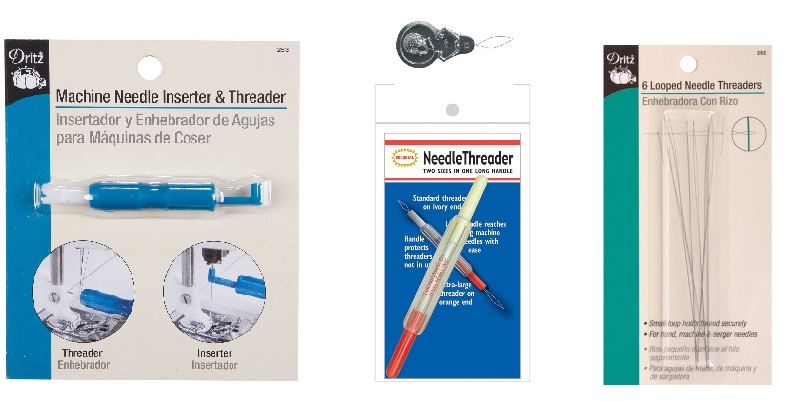
What You Need to Get Started on the Mosaic Picture Kit
Wolfpack Intl 3 Piece Chrome Magnifying Glass Set 6, 8 and 10 Optical PowerCheck PriceWhen you buy the kit, you will have everything you need to complete your project, however there are a few things that will make creating the mosaic a lot easier.
You should work in a well lighted area, so I highly recommend having a desk lamp or craft lamp. You will need Tweezers to straightened the pixels and occasionally a magnifying glass is helpful.
Reading the pixel numbers on the squares of pixels was nearly impossible for me.
When I used my magnifying glass, I could easily make out the numbers.
This is obviously essential with this craft.
Organize You Supplies
Proper Organization Will Be a Huge Time Saver
 I highly recommend organizing your supplies. As a matter of fact, I cannot stress this enough. I know you will be anxious to get started creating your gorgeous mosaic, but you will not want to skip this step.
My Organization Method
- Sort and check contents of the kit against the included supply list. Make sure everything is there before you start.
- Divide the Pixel Squares by number and place each set in a separate sandwich bag.
- Label each bag with the Pixel number in the upper right corner. Use a marker to label the baggie so it will be easier to read.
- Put the sandwich bags in numerical order.
- Place them in order, in a box.
![]()

Start Your Mosaic Picture Art
Page 1, Baseplate 1
Working left to right, carefully place a baseplate over the first Design Sheet pattern. The baseplate should be set lined up with the printed rectangle on the DesignSheet pattern.
Be sure the arrow on the backside of the baseplate is pointing toward the top of the page.
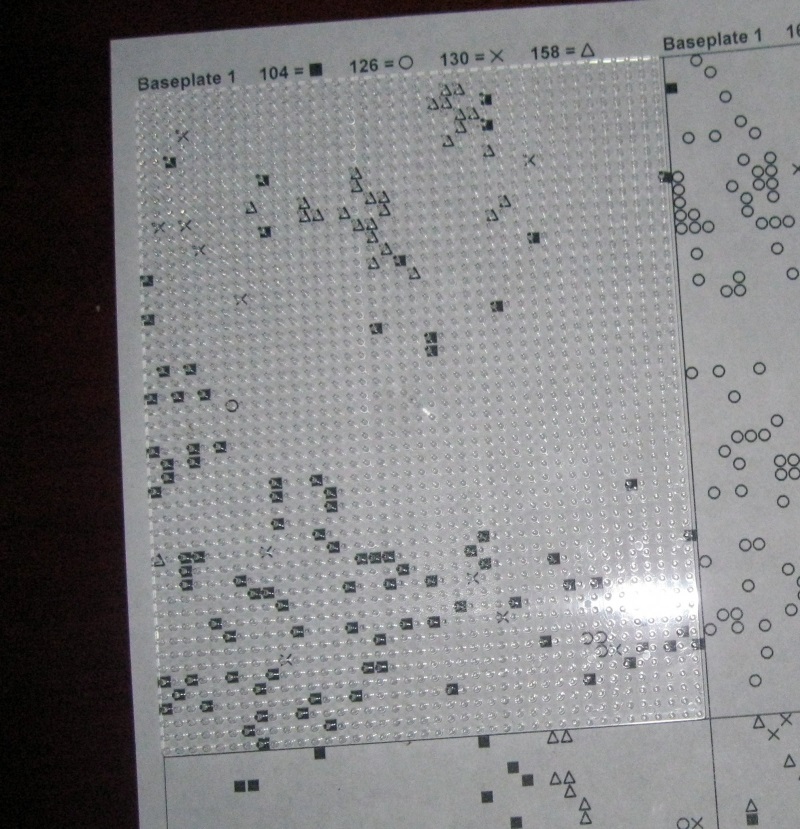
Make certain the pegs on the baseplate are properly positioned over the pattern symbols.
You will see that it says Baseplate 1 and shows the pixel colors needed for this design frame.
Simply pull the pixel colors designated and you are ready to start your mosaic picture!
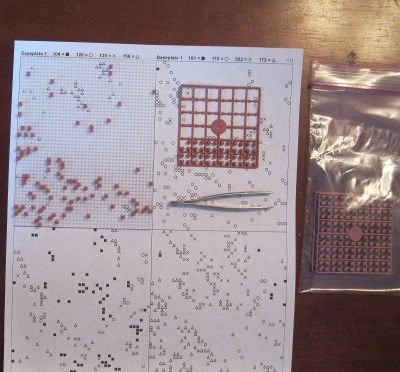 Snap the individual pixels from the pixel square and press them into place over the coordinating symbol. Use the tweezers to straighten your pieces as needed.
Note: You may even find that using the tweezers to place your pixels is easier than placing them with your fingers, especially as the baseplate grid becomes full and you have only a few pixels left to set into place.
When you have finished placing pixels over all the symbols in frame 1 of baseplate 1, move to the second frame of the pattern. Repeat this steps until Baseplate 1 is completed. I do recommend labeling this Baseplate as #1 with a post-it note before moving to the next baseplate. Continue to the next Baseplate until all the Baseplates have been completed.
Assemble and Finish Your Mosaic Picture
Mounting Board
PRES ON Pres-On Mounting Board, 11 by 14-InchCheck Price
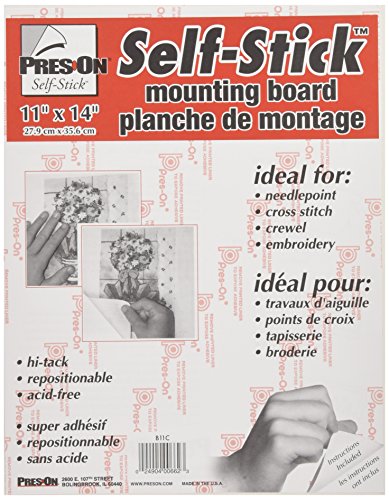
The kit does not include a mounting board. You will need to buy that separately.
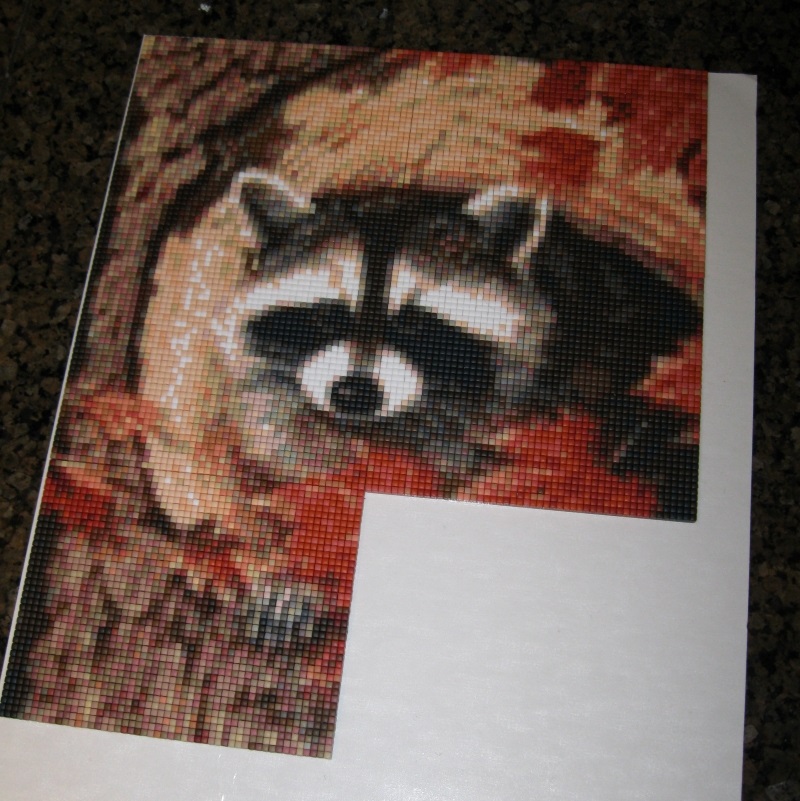
Lay out the individual baseplate in the correct order.
Carefully place the baseplates on a foam mounting board.Mat and Frame Your Finished Mosaic Picture!
This is the mounting board I recommend for this project.
It is strong enough to actually stick and hold the baseplates of the Mosaic kits.
Finished and Framed Raccoon Babe Mosaic Picture Kit
HAPPY BIRTHDAY DAD!
Where to Purchase a HobbyWare Mosaic Picture Kit
In these difficult economic times, I always strive to find the very best deal on anything, but especially my crafting endeavors. Because there is usually no necessary time requirement, I watch for the kits to go on sale.
However, this particular kit is simply not always easy to find, much less easy to find on sale. Since I have featured my Raccoon Babe Mosaic, I wish I could tell you where to get one, however the company where I purchased mine, is now out of business.
I do recommend checking both Amazon and eBay for a better deal before you pay the full price.
More Mosaic Art Kits – by HobbyWare aka PixelHobby
Before I even finished the little raccoon babe kit, my husband said he would really like to have an Eagle Mosaic. He has collected Eagle pictures, sculptures, figurines, etc. for as long as I can remember.
I have personally always loved Gray Wolves! However, flowers would be a beautiful addition to our den artwork.
Now I just have to decide what my next Mosaic Picture Art project will be!
PixelHobby Sunflowers & Songbirds Kit & Frame Mosaic Art KitCheck PricePixelHobby Nativity Kit & Frame Mosaic Art KitCheck PricePixelHobby White Owl Mosaic Art KitCheck PricePixelHobby Friends in The Field Kit & Frame Mosaic Art KitCheck PricePixelHobby Spring Bouquet Mosaic Art KitCheck PricePixelHobby The Tears of Angels Mosaic Art KitCheck Price


7 Comments
Jenny rivard
I work with puxel hobbywate to. I make my own patterns from picturs. Ever since last month i havent been anle to get supplies. The compnany in the us stopped selling the product. Do you know where i can get supplies ty jenny
Sylvestermouse
To my knowledge, there is no supplier in the US at this time. Everything seems to direct us to https://www.pixelhobby.com/?lang=en. I recommend emailing them to find out where to get additional or separate supplies (separate from kits). I hope we get another store in the US to serve our needs soon!
Ada Woloshyn
Hi, My name is Ada, I am from Canada. My supplier for pixel art supplies was also the American site., but apparently it closed down. I went looking for another supplier and found their Australian site. I contacted them and was told they supplied the American site. the e-mail I got was from a girl named Tereena Clark. I was told by her that she does all the kits.The web site if you are interested is pixelhobby.com.au/shop Thank You, Ada
Sylvestermouse
Thank you so much for sharing the information Ada!
Ada Woloshyn
Thank you for your reply. I just wanted to help. I do not want to create an account. Thank you, Ada
Paula Kelly
I absolutely love doing the pixel hobby mosaic pictures. I have questions about the matting and framing process. Did you put glass over the picture? How do you fasten the picture and mounting board in the frame? Isn’t it pretty thick by the time you use the backing and matting? Any help is much appreciated! The base plates now come with little “cut outs” on the back and black fasteners to hold the plates together for framing.
Sylvestermouse
Yes, it is thick when finished. I take my finished mosaics to Hobby Lobby and have them mount & frame them, but any frame shop can do that for you. I opt for glass in order to keep dust off of the picture.