
Potholder Pro Looms: How to Make Large Potholders
 For many of us, the first craft we ever created was a potholder made on a potholder loom. The small potholder loom kits for kids are really neat and the potholders make wonderful gifts for children to give. As a child, I enjoyed this craft greatly, mostly because I loved making useful gifts. But here’s the great news! Potholder looms are no longer made for just kids! I recently discovered the Potholder Pro Loom Kit for larger hands and larger potholders. Of course, I had to revisit my beloved childhood craft.
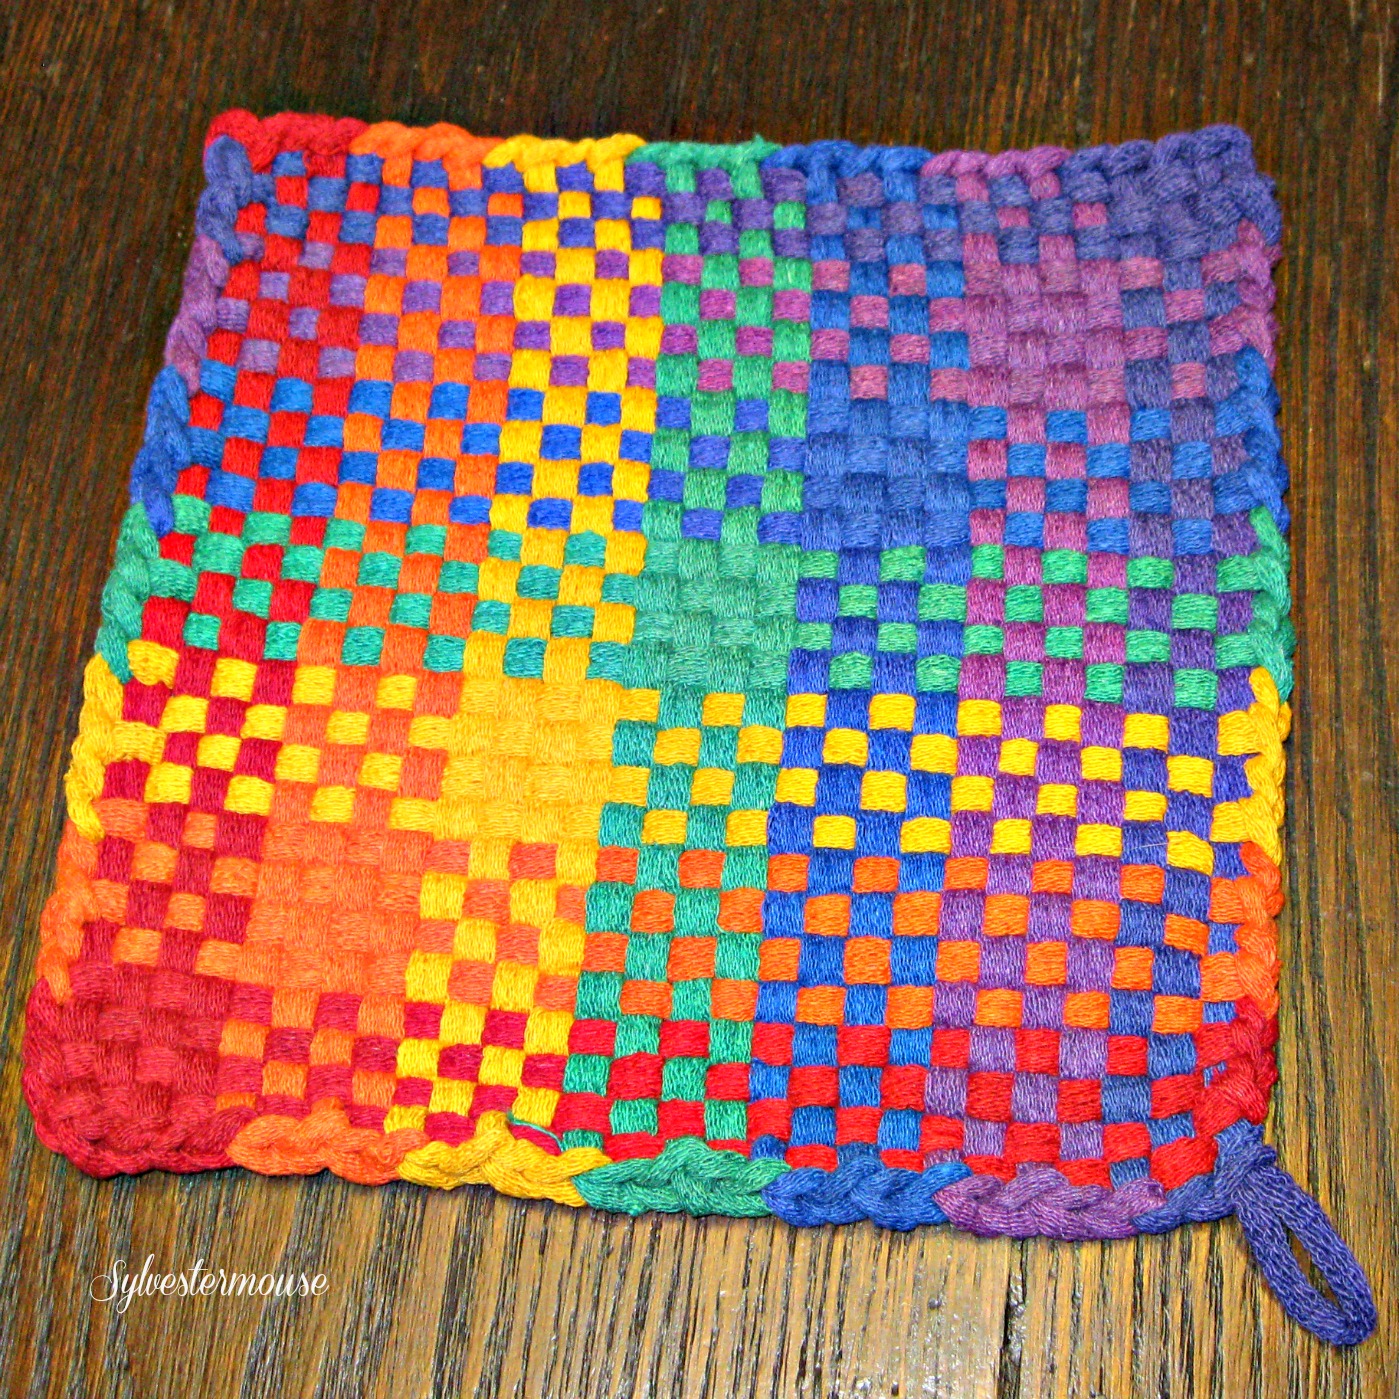
In addition to the loom kit, I also purchased an extra bag of loops. I remembered needing more loops in specific colors to make the potholders I desired. When I sat down to make my first “adult” potholder, I started by separating the loops by color and putting each color in a ziplock sandwich bag. I counted them and sadly found that I did not have enough of any two colors to make one potholder. Therefore, I opted to make a potholder of rainbow colors. I do love rainbows, so that turned out to be a good choice.
It takes 42 loops to complete 1 potholder with the Pro Kit.
I made my first big potholder in less than 2 hours. I found that it is still fun to make potholders. The difference is, this one I made for myself and my own home. The Potholder Pro is truly awesome and a wonderful way to relive those great memories in crafting. I may just make a few more to give as gifts too!
The 10″ Potholder Pro Loom Kit by Harrisville Designs
Harrisville Designs 10″ Harrisville Designs 10″ Potholder (PRO Size) Loom KitThis is a much improved loom kit compared to the kit I had as a child. Instead of a plastic loom with straight spokes, this kit includes a metal loom with bent spokes. The bent spokes hold the loops on the loom. That is a huge improvement over the plastic looms that allowed the loops to slip off too easily.
Something else I noted while making my large potholders, the loops were not too short. I used to get so frustrated when a loop was too short for the loom, especially when the colors were so limited.
What Comes in the Potholder Pro Kit
- 10″ x 10″ Metal Loom with Bent Spokes
- Bag of Loops – Varied Colors
- Metal Hook for Weaving
- Plastic Crochet Hook
- Instructions
Keep in Mind:
- Finished potholders are 8″, which is larger than the potholders we made when we were children.
- Not enough loops of one color in two packages to make a solid color or 2 color potholder. It would take 3 or 4 bags of mixed color loops to get enough of two colors to make a two color potholder.
- Bags of Single Color Loops are available.
Less than 2 hours to finish a potholder!
Harrisville Designs PRO 10 Inch Pro Size LoopsCheck PriceHarrisville Designs PRO 10 Cotton Loops, Red by Harrisville DesignsCheck PriceHarrisville Designs PRO 10 Inch Pro Size LoopsCheck PriceHarrisville Designs Friendly Loom Potholder Cotton Loops 10 Inch Pro Size LoopsCheck Price
Basic Instructions to Make a Potholder on the Potholder Pro Loom
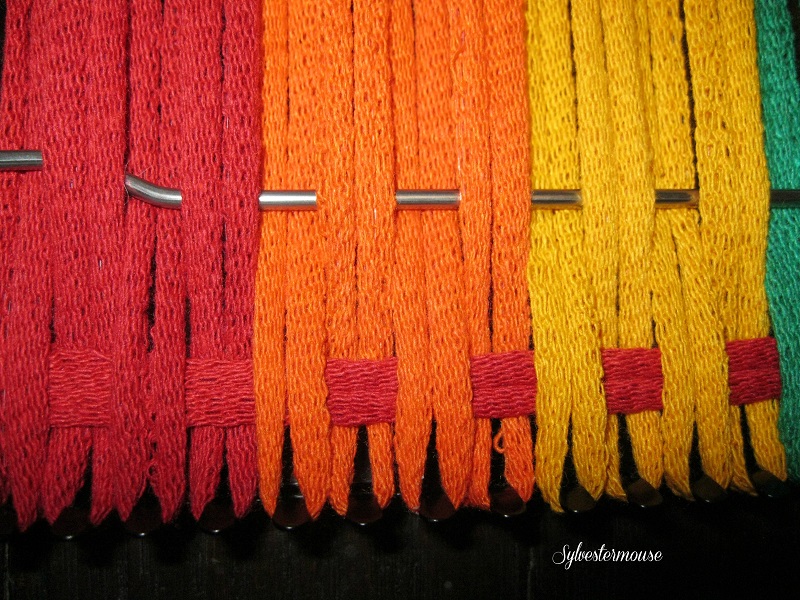
- Stretch loops across from one side to the other, hooking the loop ends on the metal spokes
- Thread the metal hook tool though the loops on the loom, alternating above and below each loop (2 “threads” for loop set)
- Carefully pull a new loop through using the hooked end
- Repeat the weaving process with another loop, except start with the first loop set over the metal hook and alternate below and above each loop set. (See the Image Below)
- Continue until all loom spokes are holding a loop end
Finishing the Potholder Edges
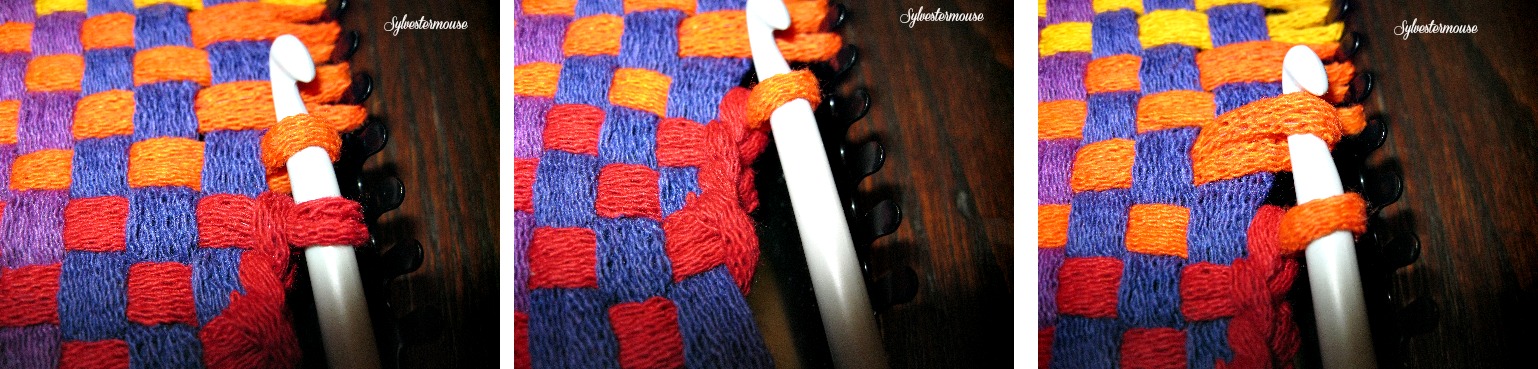
Use the picture below to understand and follow these directions. I used the red and orange loops to make it easier to see what actually happens.
-
- Start at one corner and slip two loops onto the crochet hook (Image 1)
- Pull the loop closest to the hook end (orange in the photo) through the first loop (red in the photo), leaving one loop on the hook (Image 2)
- Slip the next loop off of the loom spoke and onto the crochet hook (Image 3)
- Pull that loop through as before
- Continue all the way around the loom
- Pull the finial remaining loop taut to complete the potholder. Use that loop as the potholder hanger
Note: You may wish to grab a needle and thread to sew the final loop in place just to keep the potholder from coming unraveled later.
Enjoy Your New Large Potholder!

2 Comments
Deb
The potholders I made as a young girl were not made using these cotton loops. I’m not sure what they were made of but I’m afraid these are not going to be as heat resistant as they used to be. Any ideas where to get the older style of loops?
Sylvestermouse
I’m not sure where you might find the older loops. Maybe Ebay or Etsy sellers would offer them from time to time.